Table of Contents
- 10.1. Introduction
- 10.2. Zend_View: Object Oriented Templating
- 10.3. The ZFBlog Application Setup
- 10.4. Creating An Index Page With HTML 5
- 10.5. Extracting Static Markup Into A Layout
- 10.6. Replacing Changeable Elements With Placeholders
- 10.7. Improving HTML 5 Support With Custom View Helpers
- 10.8. Adding A Link To A Custom Stylesheet
- 10.9. Customising The Style
- 10.10. Conclusion
![[Important]](/images/docbook/important.png)
|
Important |
|---|---|
|
This is a draft chapter. Content may change and new sections be added in the coming days. Your feedback is, as always, welcome in the paragraph or chapter level comments including any criticism (more than welcome!) or suggestions for future updates to this chapter. |
In this chapter we will
be creating a simple web design for our blog. Obviously this falls into
the View layer of the Model-View-Controller (MVC) architectural design
pattern. On a more basic level, it's primarily the HTML markup and CSS
styling the blog will be using. Like many frameworks, all markup will be
stored as templates in our application which are rendered at the end of
any request and sent in a response to the user. It gets more interesting
when you consider that a complex HTML page can be broken down into
reusable or conditionally reusable elements. For example, every HTML page
likely has reusable elements like a header, a footer, a navigation menu, a
breadcrumb trail, etc. Alongside these elements are dynamic content and
some other elements that are needed only for particular pages. In other
places you need to apply special formatting rules, or insert formatted
data from your database. Leveraging Zend Framework's templating via
Zend_View can reduce duplicating all this markup
and template processing from template to template by using View Helpers,
Partials, Placeholders and Zend_Layout for the
outermost common markup like the <head>,
<title>, <html> and other elements
including any CSS stylesheet links or Javascript files that need to be
included.
I'm quite a bad web designer (sorry!) so for the our blog application I'll keep to a relatively simple design that someone else can supercharge later. The blog's markup will use HTML 5. HTML 5 is the next major revision of HTML so it seemed fitting to do some experimentation with the new standard. Since the XHTML 2.0 project has been shut down (at least for now) it's also the next major pseudo-replacement for XHTML. HTML 5, for the record, can technically be delivered as either an HTML or XML based serialisation (i.e. either text/html or application/xml+xhtml along with the syntax rules each implies). Given browser support (IE does not accept the XML content type), only the HTML serialisation is really viable though I will use XHTML conventions such as closing all tags and using lowercase attribute and tag names as much as possible since I am most familiar with those.
My use of HTML 5 should
be considered experimental. It's not a final recommendation yet and not
all browsers support it. You should be considering Firefox 3.5, Internet
Explorer 8 or any other more recent browser version for use with HTML 5 -
anything older will have patchy support. HTML 5 is, however, backwards
compatible to a degree with HTML 4. It does need some coaxing with
Internet Explorer when styling (IE doesn't recognise the new HTML 5
elements and can't style them - unlike other browsers) but we'll solve
that later using a very neat and small javascript library, html5shiv.
To assist in styling, I
will also be using the Yahoo User Interface (YUI)
Library's CSS framework. I'll use this to normalise behaviour across
all major browsers (i.e. font types, sizes, element spacing and margins,
etc.). I will also use its grid implementation to setup page sections more
easily. YUI CSS is only one of many CSS Frameworks. In the past I've used
Elastic and Blueprint CSS. These
frameworks are used primarily to save development time and write
(hopefully) less CSS - an important factor for me since my design skills
leave much to be desired and I could spend hours playing with CSS
settings!
I really don't like
editing too much CSS when I can entice a monkey with vast bags of peanuts
to do a better job later on. That or a professional web designer (probably
better than the monkey). For the moment I just need a nice default design
which looks kind of okay in a pinch. In this article we're going to take a
stab at setting up a default blog style, using some filler content, and
finally capturing the design with Zend_View
templates.
We PHP programmers have been using template engines since the dawn of PHP. In fact, PHP itself is a template engine and that was the original raison d'être for its entire existence - you can mix PHP into your HTML or other markup very easily. One thing we have not been great at is making a distinction between presentation (markup/formatting) and presentation logic (encapsulates logic for generating markup, formatting elements, or even accessing the Model). Mostly, the distinction has been to separate PHP from HTML which completely misses the point since you are only replacing PHP with a custom tag language. This strategy's sole redeeming factor is that it often prevents web designers from using PHP itself - a valid concern no doubt. PHP is a template engine so there is nothing wrong with mixing PHP and HTML. It's part and parcel of how PHP works. Doing it in a more deliberate manner as part of a templating system simply pushes us into doing it right.
Zend_View
is the Zend Framework's template rendering solution which formalises the
concept of separating presentation from presentation logic. It's an object
oriented solution which does not use a tag based system (e.g. like that
used by Smarty or Java's JavaServer Pages (JSP)). Templates rendered by
Zend_View use PHP directly instead. At a higher
level, Zend_View encapsulates an application's
View, from MVC, which accepts user input and outputs a presentation of the
application, whether it be HTML, XML, JSON, etc., based on any data it is
either provided with or designed to independently retrieve. Technically
Zend_View doesn't accept user input since this is
handled in the Controller layer - there is some leakage between Views and
Controllers in this respect once you use MVC for web applications rather
than desktop applications given the nature of HTTP, and besides, the
Controller is itself a presentation mechanic. It's strictly related to the
current request and manages response construction and output.
The most important
aspect of Zend_View templating is that it is object
oriented. You may use absolutely any value type in a template: arrays,
scalars, objects and even PHP resources. There is no intermediary tag
system between you and the full power of PHP. Part of this OOP approach is
that all templates are effectively executed within the variable scope of
the current Zend_View instance. To explain this
consider the following template.
<html><head><title>My Page</title></head><body><?php echo strtolower($this->myName) ?></body></html>
In this template we see that PHP is used directly. We also see a reference to $this - representing the current object instance. But the template is not an object! Where does this come from?
Templates are included
into the Zend_View::_run() protected method when
being rendered and output buffering is used to capture the evaluated
content. So any template content is effectively treated as evaluated code
within Zend_View::_run(), i.e. you can access
class methods, properties (like the public
Zend_View::$myName) and other features as if you were
writing a method on Zend_View itself (which
effectively you are!).
How does this influence
our thinking about the View? Since all templates are essentially method
calls (in one form or another) it stands to reason that templates are
indirectly amenable to all the advantages offered by object oriented
programming. Templates can be nested, repeated, refactored, and
encapsulated in other objects (View Helpers) through composition. This
becomes more evident once you meet several concepts offered by
Zend_View: View Helpers, Placeholders and Layouts.
It is also evident from our discussions so far regarding the role of the
Model. As I noted in Chapter 3: The
Model, Views can directly access and read from Models using View
Helpers, without the need for any Controller code to manage that
interaction.
The concept of Layouts
is implemented by Zend_Layout. A Layout is that
part of your presentation which remains relatively static across many
(or all) pages. In a standard HTML document, this would likely include
the header, footer, navigation menu, and any other section common to
many pages. Since these parts remain largely static, it's pointless
duplicating it across every single page level template. It would be
impossible to maintain, requiring countless other templates to be
altered for any change. For this reason, we can use
Zend_Layout to create a number of Layout
templates, into which all other template output is injected. This
ensures templates in the rest of the application need not concern
themselves with a common layout - it's offloaded to
Zend_Layout.
A simple Layout template could be:
<html><head><title>My Page</title></head><body><?php echo $this->layout()->content ?></body></html>
As we discussed in
previous chapters, the Controller implements View rendering by default
using the ViewHelper Action Helper. Zend_Layout
registers a new Action Helper and a FrontController Plugin,
Zend_Layout_Controller_Action_Helper_Layout and
Zend_Layout_Controller_Plugin_Layout, which allow
rendering of a layout and access to the Layout instance from Controllers
respectively. We'll cover Helpers and Plugins in more detail later but
they may implement a hook method which is called automatically by the
FrontController after certain events occur, in this case a
postDispatch() method which is called when a request is dispatched to a
Controller. The output from the Controller matched View gets assigned to
the Layout template's public $content property which we may in turn echo
at any point in the Layout template, such as between the
<body> tags in our example.
Zend_Layout
also allows you to selectively disable layout rendering from
Controllers, using the registered Action Helper. This is important when
outputting something other than HTML, like JSON for example. Wrapping
JSON or XML output in a HTML layout probably won't work in your favour.
You can also swap layouts or set different layout variables from
Controllers, so it's a very flexible system.
In terms of design
patterns, Zend_Layout implements a loose form of
Two
Step View as described by Martin Fowler in Patterns Of
Enterprise Application Architecture (POEAA). Fowler's
definition of the Two Step View states:
Turns domain data into HTML in two steps: first by forming some kind of logical page, then rendering the logical page into HTML.
Obviously, in our
case, the domain data is rendered immediately into HTML before being
inserted into a specific point in the layout's HTML. The use of a Two
Step View approach to layouts complements
Zend_View's template composition approach as
described below when using Partials.
You should also be
aware that while Zend_Layout handles all the
mechanics of layout assignments, the Layout template itself is rendered
by an instance of Zend_View. So your Layouts may
make full use of the typical Zend_View goodies
like Partials, Placeholders and View Helpers. This can be something of a
confusing point and may encourage a less than optimal solution I'll
mention now.
One aspect of
Zend_Layout to be careful with is that the
Reference Guide mentions that Layouts and named response segments can be
used in conjunction with the ActionStack Action Helper to create
widgetised pages, i.e. each Action renders a View which is inserted into
the template at its assigned point. There is an extremely important
proviso to consider here - dispatching an action is an expensive task.
As the name ActionStack suggests, this Action Helper creates a stack of
Controller Actions to execute in turn requiring multiple dispatches of
nearly the entire MVC framework. This should be avoided unless
absolutely necessary. There is almost no reason to use the ActionStack
since anything it achieves can be just as easily achieved using View
Helpers at a fraction of the performance cost. Here's a blog post from
Ryan Mauger explaining this in a bit more detail in Why
the Zend Framework Actionstack is Evil. Note that this does not
mean you should never use this aspect of Zend Framework but that you
should have a very concrete need and have a tolerance for the inevitable
performance hit.
Partials have a very simple use case. They are fragments of a higher level template which can be rendered, either once or repeatedly, at a specific point in the parent template. Partials may also be called "template fragments" to reflect this. A simple use case would be our blog's index page which may display a number of articles. The markup for each article is almost identical, differing only by the article text included. We could easily split this common article markup into a single partial, and loop through a collection of articles rendering each in turn. Besides reducing the amount of markup in a template, and offering a simple mechanism for looping through a data collection, they also afford some reusability. We could have article markup in the index page, the entry specific page, and several other locations. Using a partial isolates this repeated markup ensuring we can make global changes from a single location.
These template
fragments, along with any other markup generating mechanism, form an
implementation of the Composite
View design pattern defined in the book, Core J2EE
Patterns.
Use composite views that are composed of multiple atomic subviews. Each component of the template may be included dynamically into the whole and the layout of the page may be managed independently of the content.
An observation from our earlier examination of Layouts that I would make is that the Two Step View is itself a sub-pattern of the Composite View. In POEAA, Fowler skipped over a number of View related design patterns now in common use such as Composite View and View Helper which were instead formally defined in the Core J2EE Patterns book some time later.
Zend_View
partials are implemented by the
Zend_View_Helper_Partial and
Zend_View_Helper_PartialLoop View Helpers. We
cover View Helpers in the next section. The first helper renders a
partial template once on every call and can be used either as a once off
rendering or be embedded in a looping mechanism within the parent
template. The second class specifically supports looping internally so
that looping need not be embedded in the parent template.
The parameter passed
to a partial may not be arbitrary, it must be an associative array or an
object implementing a toArray() method.
Otherwise it will be reduced to an array of object properties using
get_object_vars(). From the resulting associative
array, the keys are assigned as local class property names with their
matching values assigned.
Consider the following example passing some minor data to a typical non-looping partial.
<?php echo $this->partial('article.phtml', array('title'=>'Title','content'=>'My Content!')) ?>
The article.phtml file
is just like any other template except that it is only called as a
partial. It would access the passed data as local class properties from
it's own host Zend_View instance.
<article><h3><?php echo $this->escape($this->title) ?></h3><div class="content"><?php echo $this->content ?></div<article>
When using the partial
loop helper, the parameter should be an array of items to loop through
(each item following the same rules as a normal partial parameter) or
any iterable object returning a valid partial parameter. As an example,
the Zend_Db_Table_Rowset class is an iterable
collection of objects of type Zend_Db_Table_Row.
Each instance of Zend_Db_Table_Row implements a
toArray() method. This means a rowset is a
valid partial loop parameter.
For example, we could use our earlier partial by passing in an array of articles using the partial loop helper.
<?php echo $this->partialLoop('article.phtml', array(array('title'=>'Title', 'content'=>'My Content!'),array('title'=>'Title2', 'content'=>'More Content!'))) ?>
Besides arrays, you
can pass in objects directly and bypass the attempted casting of the
object to an array. This is accomplished by setting an object key before
calling the Zend_View::partial() or
Zend_View::partialLoop() methods with any
parameters. Remember that a parameterless call to a View Helper's
primary method will usually just return the View Helper object for
method chaining. For example:
<?php echo $this->partialLoop()->setObjectKey('article')->partialLoop($articleCollection) ?>
In the above example,
all objects in the iterable Collection object
(something we might implement in our domain model) are added to the
partial template's host class as a public $article
property. Within the partial we could do something like:
<article><h3><?php echo $this->escape($this->article->title) ?></h3><div class="content"><?php echo $this->article->content ?></div></article>
This might not be the most brief example, afterall, using objects means the partial references are even longer. An array might be simpler but there are cases where using the object itself has benefits since a domain object may have lazy loaded references to other domain objects, like the Author of our Article in Chapter 9.
Partials have two
other facets of importance. First, they operate in a separate variable
scope from the parent template. This effectively means they are only
aware of data specifically passed to them when calling the
Zend_View::partial() or
Zend_View::partialLoop() methods (these are
mapped to Zend_View_Helper_Partial::partial()
and Zend_View_Helper_Partial::partialLoop()
respectively as that View Helper's primary method). They are not aware
of any data set on the parent View from a controller or, if a second
level nested fragment, the parent partial. This imposed restriction
encourages a more object oriented approach to templating and prevents
the leakage of data across multiple templates and template fragments
(i.e. the problem which besets OOP designs employing global variables).
This is simply good practice - we don't allow globals (hopefully) to
contaminate the variable scope of our objects, so why should we allow
the same for templates? All templates should be insulated from each
other to prevent unwanted dependencies emerging that would make testing,
maintenance and change more costly.
On a final note, you can nest a partial into another partial. You could have a whole tree of them if needed. It really depends on what your partial represents. A small slice of markup or a much larger part of a page template or layout. The nature of the template game is to compose a single view out of many constituent parts. How those parts are constructed or divided to prevent duplication of markup and encapsulate reusable functionality will depend on your needs.
If partials are the means of separating markup into reusable parcels, their presentation logic counterparts are View Helpers. A View Helper is used to create a reusable operation applied to a template. For example, imagine a partial has been passed a domain object representing a user comment. It contains a name, email, URL, some text and a date. The first four are easy, but how do you format the date for presentation? Your partial could include some PHP code to parse the date (depending on the date standard used), and recompose it into a desired readable form. But entries have published dates and even modified dates, so do comments. Will you repeat this PHP code everywhere?
This is obviously not
a very maintainable solution. If something changes, and you need to
reconfigure the parsing logic used, you could have lots of templates to
edit. It would be far easier to encapsulate this PHP functionality as a
View Helper, a reusable class that can be called from any template at
any time. You could implement this as a
ZFExt_View_Helper_FormatDate class (a custom
helper), containing a formatDate() method to
accept an arbitrary date and return a formatted form according to a
specified pattern, like "YYYY-MM". This produces an easy to reuse class,
which can benefit from unit testing and also be ported to other projects
for reuse.
As I also discussed in
Chapter 3: The
    Model
, View Helpers can
also be used to encapsulate a Model using, for example, the last
chapter's implementation of a simple Data Mapper. Your helper can now
query the domain model for some data, format it and add markup, and
return the final result for immediate insertion at a template point. The
primary concern with this approach is to always remember that a View
Helper should never alter the domain model it interacts with - that is
the concern of whatever Controller is handling user input. View Helpers
are therefore a really useful feature. You can offload special
formatting, menu generation, model querying and decoration with markup
and a lot more to View Helpers.
View Helpers are also
defined as a distinct pattern, as the View
Helper design pattern, in the Core J2EE
Patterns book.
All View Helpers
follow a similar design. They implement a method with a name matching
the class name, so ZFExt_View_Helper_FormatDate
would define the method
ZFExt_View_Helper_FormatDate::formatDate().
This "primary" method will usually accept parameters for the helper to
operate on and return the results. For more complex helpers with many
public methods, this primary method may also return the object itself.
Since ZFExt_View_Helper_FormatDate would be a
custom View Helper, you would also need to tell
Zend_View where to find it, and what its class
namespace is.
Let's consider a
simple example. We've decided at the prompting of some analysis of our
web page's loading performance to ensure that any javascript or css
files can be cached by a client for extended periods. This is covered by
the well documented Yahoo
Performance Best Practices in the section Add
an Expires or a Cache-Control Header. We therefore run off and
configure Apache to use a far in the future Expires header when serving
static files likes CSS or Javascript. We now find another problem - if
the client caches these forever, how can we roll out changes and
updates? A common strategy is to append a URI query string to the static
file URIs which is updated in our markup whenever the referenced file
changes. The cached resource uses the original URI (you can cache URIs
with query strings if an explicit Expires header is sent), but when it
changes the client will load from the new URI since the query string has
changed, i.e. it's a new resource.
This would create a
URI of the form:
http://zfblog.tld/css/style.css?1185131970. The final query
string is, very obviously, a timestamp representing the file
modification date. You could just as easily use a version number. Let's
write a View Helper which can automatically assign these query strings
so that our updates alter their URIs on the fly without any manual
intervention. Your custom helpers may extend from
Zend_View_Helper_Abstract which offers some
standard functionality if needed (we don't here).
<?phpclass ZFExt_View_Helper_AppendModifiedDate extends Zend_View_Helper_Abstract{public function appendModifiedDate($file) {$root = getcwd();$filepath = $root . $file;$mtime = filemtime($filepath);return $file . '?' . $mtime;}}
The new View Helper is short and to the point. It accepts the relative path to a file on our server as normally used in markup, checks the file modified date, and appends that date as a timestamp to the path. The resulting path can then be passed to any other helper (e.g. the HeadLink or HeadScript View Helpers) or outputted directly into the relevant markup. Here's a template fragment using the new custom helper.
<link rel="stylesheet" href="<?php echo $this->appendModifiedDate('/css/style.css') ?>" type="text/css" media="screen" />
Besides writing custom
helpers, the Zend Framework offers some standard View Helpers for common
tasks like managing markup generation (e.g. form and head elements).
We'll cover several of these soon which use one more feature of
Zend_View called Placeholders.
Placeholders address a
specific need in templating with Zend Framework. They allow templates to
access a shared registry of data, regardless of their variable scope.
This is very close to the Registry Pattern, which in Zend Framework is
often implemented using Zend_Registry, but has a
more specific use case here. Consider a scenario where you discover that
a web page needs to use some specific piece of javascript loaded as
early as possible. Your layout does not contain it since it's just not
needed for everything. Placeholders can resolve this dilemma by allowing
templates and partials to add values to a Placeholder, a key in this
shared registry. When a parent template or layout is rendered, it can
then render the Placeholder data at any point it specifies. For
Javascript, this is handled by a specialised Placeholder implemented by
Zend_View_Helper_HeadScript with which you can
append, prepend, overwrite or set at a specific index any javascript you
need from any sub-template before it is finally rendered in a
layout.
Aside from offering a selection of specialised Placeholders like HeadLink, HeadMeta, etc, you can utilise the base Placeholder View Helper for any other data needing to be communicated across templates. Let's look at an example where we have a layout that can insert the output from a Placeholder. The layout offers a render point allowing any templates to change the text attached to a standard header.
<html><head><title>My Page</title></head><body><h1><?php echo $this->placeholder('pageHeader') ?></h1><?php echo $this->layout()->content ?></body></html>
We can now set this value from any other template (including partials).
<?php $this->placeholder('pageHeader')->set('About') ?><p>My name is Joe. Joe Bloggs.</p>
Unlike the more specific Placeholder implementations, the generic Placeholder helper can be used for any value. If it's a specific value following specific formatting rules you can subclass the general helper to also add this formatting when it's echoed into a template. For example, let's implement a custom View Helper to format a page header using HTML 5.
<?phpclass ZFExt_View_Helper_PageHeader extends Zend_View_Helper_Placeholder{public function pageHeader(){return $this;}public function set($value){parent::placeholder('pageHeader')->set($value);}public function __string(){return "<h1>" . (string) parent::placeholder('pageHeader') . "</h1>";}}
This is a very simple
example which merely acts to create a concrete wrapper around the
Placeholder container matching the key "pageHeader". It also encloses
the page title value in <h1> tags. Here is our layout
and page template using the new concrete Placeholder.
<html><head><title>My Page</title></head><body><?php echo $this->pageHeader() ?><?php echo $this->layout()->content ?></body></html>
<?php $this->pageHeader()->set('About') ?><p>My name is Joe. Joe Bloggs.</p>
You may notice that
throughout the book I show a preference for using full PHP tags, i.e.
<?php (echo) ... ?>, in preference to short tags,
<?(=) ... ?>. Short tags are an optional PHP setting.
While many servers have them enabled to increase compatibility with
applications utilising them, many stock servers will not since they are
disabled in PHP's recommended configuration file, php.ini.recommended.
In addition, we know that PHP 6 may deprecate short tags completely to
resolve a conflict with XML declarations which use a similar form,
<?xml ... ?>. Traditionally, XML declarations have to
be echoed if generating XML from a template using short tags.
Personally, I consider the probable PHP6 deprecation a nuisance. Writing
<?php echo ... ?> more than a few times is plain
annoying to me, then again since it is an optional setting, distributed
applications should never use it anyway. In any case, it's better to
stick with what definitely works now rather than risk it breaking
later.
The Zend Framework has
allowed short tags to be used, regardless of configuration, using a
stream wrapper. This is enabled if the short tags option is disabled in
your php.ini configuration file, i.e. the short_open_tag flag, and you
have set the useStreamWrapper option to true. You can do this using the
useStreamWrapper option key in your application.ini file or
by calling Zend_View::setUseStreamWrapper() in
your bootstrap. Using the stream wrapper will likely have a performance
cost attached so if you really need short tags, it's better to just
enable them in your PHP configuration.
Setting up the new blog
application is not horrendously difficult, just copy over the Hello World
example to the blog application's project directory where you currently
have the beginning of our application's domain model. It will make an
excellent base to start with. You may wish to add a new local domain and
Virtual Host specifically for the blog following the instructions from
that chapter and the related appendix for setting up Apache Virtual Hosts.
For the purposes of the book I'll be using the domain http://zfblog.tld.
There are no other changes required. The rest of the chapter will detail where to go from there.
The index page of our
blog will predictably be the page displaying a list of entries. Using HTML
5, let's start by looking at the opening HTML tags. Later we'll add
styling and worry about adding more elements and information to the page.
For the moment, we'll be editing
/application/views/scripts/index/index.phtml.
<!DOCTYPE html><html><head><meta name="language" content="en" /><meta charset="utf-8"/><title>Pádraic Bradys Blog</title><link href="http://yui.yahooapis.com/2.7.0/build/reset-fonts-grids/reset-fonts-grids.css" media="screen" rel="stylesheet" type="text/css" /><link href="http://yui.yahooapis.com/2.7.0/build/base/base-min.css" media="screen" rel="stylesheet" type="text/css" /><!--[if IE]><script type="text/javascript" src="http://html5shiv.googlecode.com/svn/trunk/html5.js"></script><![endif]--></head>
HTML 5 uses a simplified
Doctype which pretty much simply states this is HTML. There is no
versioning or other information attached or needed. As we are aware that
we can set the Doctype used by Zend_View and any
dependent components, we can print this in our template using the
Zend_View_Helper_Doctype View Helper. The Zend
Framework's support for HTML 5 extends as far as the Doctype which tells
any dependent View Helpers to use HTML 4 style tags. In fact, HTML 5 can
also be written in a similar way to XHTML, i.e. you can use lowercase tag
and attribute names, enclose attribute values in quotes, close all tags,
etc. This is my preferred method of writing HTML 5 since it feels cleaner
and I don't need to depart too far from the XHTML I'm familiar with. Zend
Framework therefore poses a minor problem - it doesn't distinguish between
HTML 5 and XHTML 5 (HTML 5 written with XML rules of wellformedness).
We'll solve this by writing a custom View Helper to add support for a
XHTML5 Doctype.
As with any HTML/XHTML,
the root element is <html>. It is immediately followed
by a <head> element which contains any
<link>, <meta>,
<title> or <style> elements we need.
These can be written in any typical style though, as I explained, I prefer
the XHTML practice. HTML 5 does add one new feature here - a new attribute
for a <meta> element called charset. This new attribute
is intended as a simplified means of informing a parser what character
encoding is used by the document, and therefore it's a valid replacement
for the common use Content-Type <meta> element. Again,
the Zend Framework does not support this as yet, so we will add a second
custom View Helper to implement it.
You may notice that even
though we can write all these tags outright into our templates, I keep
referring to implementing them as View Helpers. This is good practice,
since using the View Helpers allows other templates to modify what appears
in <head> by appending, prepending or even overwriting
what stylesheets, scripts, and meta information are initially set. You
might foresee this as advantageous in situations where a particular page
needs additional styling or a different set of javascript code not
required for all pages.
I have also added two CSS stylesheets from the Yahoo User Interface framework. These are loaded directly from a Yahoo server so we don't need to store anything locally. The first of these is a minified version of three merged stylesheets: reset, fonts and grid. The first two ensure all major browsers are on the same page, eradicating various rendering differences each implements by default. There's nothing quite like trying to deal with the inconsistencies across browsers on simple default styling. The grid styles will be used later to create a column layout more easily. The second included stylesheet, base, imposes a standard foundation styling for all major elements out of the box. At this rate, I should have relatively little CSS to write other than what applies specifically to my preferred style for the blog.
Finally, we have
included a Javascript file from the html5shiv project.
This is a relatively simple piece of Javascript used to ensure Internet
Explorer can recognise the new HTML 5 elements. Otherwise we would not be
able to style them. This is only needed for Internet Explorer so we have
wrapped this in a set of conditionals matching all versions of Internet
Explorer but excluding any other browser.
Let's now add a Header section representing the page title and the upper navigation area.
<!DOCTYPE html><html><head><meta name="language" content="en" /><meta charset="utf-8"/><title>Pádraic Brady's Blog</title><link href="http://yui.yahooapis.com/2.7.0/build/reset-fonts-grids/reset-fonts-grids.css" media="screen" rel="stylesheet" type="text/css" /><link href="http://yui.yahooapis.com/2.7.0/build/base/base-min.css" media="screen" rel="stylesheet" type="text/css" /><!--[if IE]><script type="text/javascript" src="http://html5shiv.googlecode.com/svn/trunk/html5.js"></script><![endif]--></head><body><header><h1><a href="/index.html">Pádraic Brady's Blog</a></h1><nav><ul><li><a href="/index.html">Home</a></li><li><a href="#">About</a></li><li><a href="#">Projects</a></li><li><a href="#">Contact</a></li></ul></nav></header>
With HTML 5, we can
already see some of the new elements. Our Header section is now wrapped by
the <header> tag which encloses our usual <h1>
header title and also another new member, a <nav>
element which encloses our upper navigation menu. Probably the nicest
thing here, aside from the semantic meaning, is that we can do away with a
ton of <div> elements using class attributes to tell us
what they represent.
HTML 5 provides some definitions for these new elements:
- header
-
The header element represents a group of introductory or navigational aids. A header element is intended to usually contain the section's heading (an h1–h6 element or an hgroup element), but this is not required. The header element can also be used to wrap a section's table of contents, a search form, or any relevant logos.
- nav
-
The nav element represents a section of a page that links to other pages or to parts within the page: a section with navigation links. Not all groups of links on a page need to be in a nav element — only sections that consist of major navigation blocks are appropriate for the nav element. In particular, it is common for footers to have a list of links to various key parts of a site, but the footer element is more appropriate in such cases, and no nav element is necessary for those links.
Next up, we need the main body of the markup showing where we would render our blog entries, followed by the final footer section containing a copyright and credits where necessary.
<!DOCTYPE html><html><head><meta name="language" content="en" /><meta charset="utf-8"/><title>Pádraic Brady's Blog</title><link href="http://yui.yahooapis.com/2.7.0/build/reset-fonts-grids/reset-fonts-grids.css" media="screen" rel="stylesheet" type="text/css" /><link href="http://yui.yahooapis.com/2.7.0/build/base/base-min.css" media="screen" rel="stylesheet" type="text/css" /><!--[if IE]><script type="text/javascript" src="http://html5shiv.googlecode.com/svn/trunk/html5.js"></script><![endif]--></head><body><header><h1><a href="/index.html">Pádraic Brady's Blog</a></h1><nav><ul><li><a href="/index.html">Home</a></li><li><a href="#">About</a></li><li><a href="#">Projects</a></li><li><a href="#">Contact</a></li></ul></nav></header><section><article><header><h2>One Day...Revisited</h2><p>Posted on <time datetime="2009-09-07">Tuesday, 08 September 2009</time></p></header><div><p>I forgot!</p><p>I already am writing a book!</p></div><footer><address>By Pádraic</address></footer></article><article><header><h2>One Day...</h2><p>Posted on <time datetime="2009-09-07">Monday, 07 September 2009</time></p></header><div><p>I will write a book</p></div><footer><address>By Pádraic</address></footer></article></section><footer><p>Copyright © 2009 Pádraic Brady</p><p>Powered by <a href="/index.html">ZFBlog</a></p></footer></body></html>
Well, this is new! HTML
5 has added more new elements and this is startlingly obvious now. Many
slot into places where we would expect to place <div>
tags with a class attribute referring to the purpose of the
<div>. In a typical barebones page, you might expect to
simple enclose the content in <article> tags since the
content is a single item. In our blog, however, we know each entry
rendered on the page is a self-contained article so we use multiple
<article> elements and wrap all of them in a single
<section> element (there can also be many
<section> elements if the page is divided further, and
they can be nested - not unlike Docbook XML). Each article will also have
a header and footer, and so we use the HTML 5 tags relevant for these
cases. Finally, any reference to an author's details is enclosed within
<address> tags. A bit of a confusing point, the
<address> tag does not relate to a physical address -
it's more relevant for a person's other details like their name, website,
email, description, etc.
Let's look at the definitions from the HTML 5 specification for these new elements in HTML 5.
- section
-
The section element represents a generic document or application section. A section, in this context, is a thematic grouping of content, typically with a heading, possibly with a footer.
- article
-
The article element represents a section of a page that consists of a composition that forms an independent part of a document, page, application, or site. This could be a forum post, a magazine or newspaper article, a Web log entry, a user-submitted comment, an interactive widget, or any other independent item of content. An article element is "independent" in the sense that its contents could stand alone, for example in syndication, or as a interchangeable component on a user-configurable portal page.
- footer
-
The footer element represents a footer for its nearest ancestor sectioning content. A footer typically contains information about its section such as who wrote it, links to related documents, copyright data, and the like. Contact information belongs in an address element, possibly itself inside a footer.
- address
-
The address element represents the contact information for its nearest article or body element ancestor. If that is the body element, then the contact information applies to the document as a whole. The address element must not be used to represent arbitrary addresses (e.g. postal addresses), unless those addresses are in fact the relevant contact information.
- time
-
The time element represents either a time on a 24 hour clock, or a precise date in the proleptic Gregorian calendar, optionally with a time and a time-zone offset. This element is intended as a way to encode modern dates and times in a machine-readable way so that user agents can offer to add them to the user's calendar. For example, adding birthday reminders or scheduling events.
On a brief note, the new
<time> element is not without its problems. It's tied
strictly to the Gregorian calendar so it cannot represent non-Gregorian
dates from before its introduction. Since <time> was
intended to replace the microformat <abbr> element in
hCalendar, it's actually a failure since it can't represent historical
dates. Hopefully HTML 5's final recommendation will fix this.
Open your browser and
navigate to http://zfblog.tld.
You should see the new template rendered with all the default YUI CSS
styling applied.
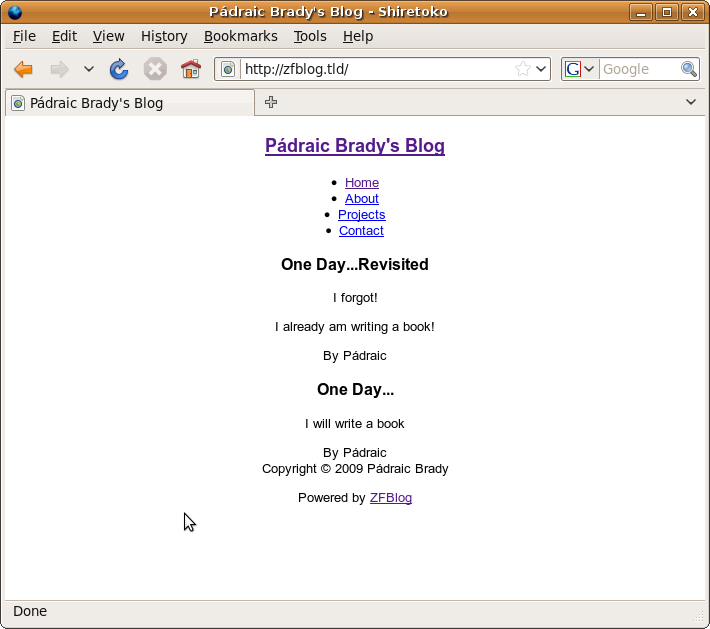
Initial Blog Index Page
Now that we have an initial design, we need to identify what parts of this template are static, i.e. that will rarely change from page to page. A quick assessment is enough to see that for our index page, only the entries would be expected to change. We could have a variable number to display and their content will be updated regularly. Armed with this, we can reduce our index template to only include the parts that are dynamic - we'll encapsulate the rest momentarily into a layout.
Here's the revised
template
/application/views/scripts/index/index.phtml.
<article><header><h2>One Day...Revisited</h2></header><div><p>I forgot!</p><p>I already am writing a book!</p></div><footer><address>By Pádraic</address></footer></article><article><header><h2>One Day...</h2></header><div><p>I will write a book</p></div><footer><address>By Pádraic</address></footer></article>
Let's push the leftover
markup into a new template, referred to as a Layout, in
/application/views/layouts/default.phtml.
<!DOCTYPE html><html><head><meta name="language" content="en" /><meta charset="utf-8"/><title>Pádraic Brady's Blog</title><link href="http://yui.yahooapis.com/2.7.0/build/reset-fonts-grids/reset-fonts-grids.css" media="screen" rel="stylesheet" type="text/css" /><link href="http://yui.yahooapis.com/2.7.0/build/base/base-min.css" media="screen" rel="stylesheet" type="text/css" /><!--[if IE]><script type="text/javascript" src="http://html5shiv.googlecode.com/svn/trunk/html5.js"></script><![endif]--></head><body><header><h1><a href="/index.html">Pádraic Brady's Blog</a></h1><nav><ul><li><a href="/index.html">Home</a></li><li><a href="#">About</a></li><li><a href="#">Projects</a></li><li><a href="#">Contact</a></li></ul></nav></header><section><?php echo $this->layout()->content ?></section><footer><p>Copyright © 2009 Pádraic Brady</p><p>Powered by <a href="/index.html">ZFBlog</a></p></footer></body></html>
You'll notice that we
are now referencing a Zend_View method
layout(). As we noted when discussing View
Helpers, a View Helper's class name reflects its primary method which is
typically used, at a minimum, to retrieve an instance of the View Helper
object. In this case, we are retrieving an instance of
Zend_View_Helper_Layout and printing whatever is
contained in its public $content property.
To understand how our
index template is pushed into the property, we need to understand that all
rendering is, by default, handled by Controllers using the ViewRenderer
Action Helper. This helper will render a template for the current
Controller and Action into a response. Zend_Layout
can then intercept the rendered response body and inject it in the layout
template. Then the entire layout is rendered in turn to finally produce
the entire page.
You should also note
that Layouts, like all templates, are executed within the variable scope
of a Zend_View object, so all View Helpers and
Zend_View methods are still accessible from your
Layouts.
To enable
Zend_Layout, we also need to configure it for use.
Typically this requires a call to the static method
Zend_Layout::startMvc() following any
configuration of the instance, however since we are using
Zend_Application for our bootstrapping we simply
need to define some configuration values for a Layout Resource in
/config/application.ini. The two options needed, and
added at the bottom of our "Standard Resource Options" section set the
name of the layout template to use by default omitting the .phtml file
extension. The second configures the path at which Layout templates can be
located.
[production]; PHP INI SettingsphpSettings.display_startup_errors = 0phpSettings.display_errors = 0; Bootstrap Locationbootstrap.path = APPLICATION_ROOT "/library/ZFExt/Bootstrap.html"bootstrap.class = "ZFExt_Bootstrap"; Standard Resource Optionsresources.frontController.controllerDirectory = APPLICATION_PATH "/controllers/index.html"resources.view.encoding = "UTF-8"resources.modifiedFrontController.contentType = "text/html;charset=utf-8"resources.layout.layout = "default"resources.layout.layoutPath = APPLICATION_PATH "/views/layouts/index.html"; HTML Markup Optionsresources.view.doctype = "HTML5"; Autoloader OptionsautoloaderNamespaces[] = "ZFExt_"[staging : production][testing : production]phpSettings.display_startup_errors = 1phpSettings.display_errors = 1resources.frontController.throwExceptions = 1[development : production]phpSettings.display_startup_errors = 1phpSettings.display_errors = 1resources.frontController.throwExceptions = 1
Returning to your
browser, navigate to http://zfblog.tld and you should the
exact same page as before with no differences. Our index template is now
being rendered into the new Layout.
To complete the picture,
let's also take this opportunity to edit the second page template in our
application at
/application/views/scripts/error/error.phtml. You'll
notice that this is not enclosed in <article> tags
since it's a generic message and not a standalone document article. I've
also switched to using a second level header <h2>
enclosed by a <header> element for the
<article>.
<header><h2>An Error Has Occurred</h2></header><div><?php if ($this->statusCode == 500): ?><p>We're truly sorry, but we cannot complete your request at thistime.</p><p>If it's any consolation, we have scheduled a new appointment for ourdevelopment team leader in Torture Chamber #7 to encourage his colleaguesto investigate this incident.</p><?php else: ?><p>We're truly sorry, but the page you are trying to locate does notexist.</p><p>Please double check the requested URL or consult your localOptometrist.</p><?php endif; ?></div>
Go ahead and give it a
test run, using an invalid URL like http://zfblog.tld/foo/bar.
Remember that you will need to temporarily disable the throwing of
Exceptions in application.ini to see the error page.
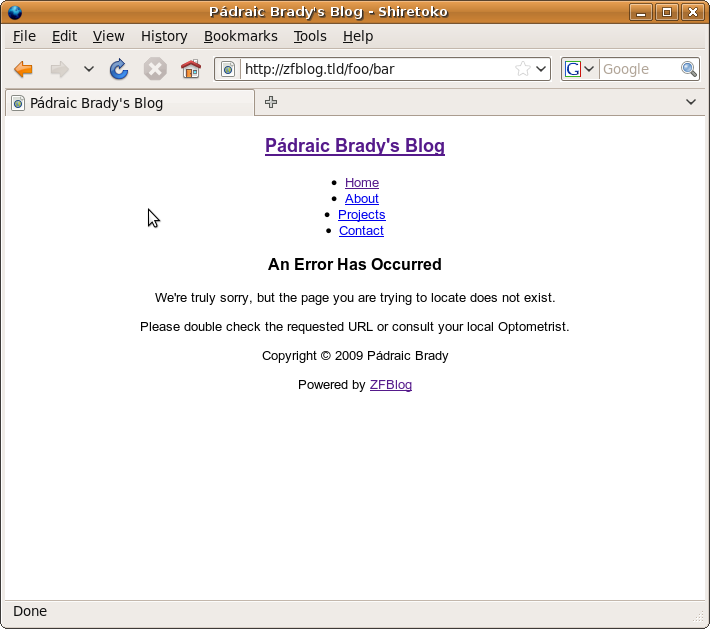
Initial Blog Error Page
Our Layout is now in
place, however we can go further and ensure that page level templates, or
even partials, can actually modify some parts of the Layout on demand,
specifically in the area of stylesheets, page titles, javascript and meta
tags. The Zend Framework can allow for such changes through the use of
Placeholders, specifically a number of concrete implementations like
Zend_View_Helper_HeadTitle,
Zend_View_Helper_Doctype, etc. As mentioned
earlier, Placeholders allow templates to add, remove, or even replace
items within a self-contained data container, the contents of which are
rendered into their final form either in an outer layer of the template
hierarchy.
Let's start by modifying
our Layout at
/application/views/layouts/default.phtml to use
several of these Placeholder View Helpers.
<?php echo $this->doctype() . "\n" ?><html><head><?phpecho $this->headMeta()->setIndent(' ') . "\n";echo $this->headTitle('Pádraic Brady\'s Blog')->setSeparator(' / ')->setIndent(' ') . "\n";echo $this->headLink()->setIndent(' ')->appendStylesheet('http://yui.yahooapis.com/2.7.0/build/reset-fonts-grids/reset-fonts-grids.css')->appendStylesheet('http://yui.yahooapis.com/2.7.0/build/base/base-min.css') . "\n ";echo $this->headScript()->prependFile('http://html5shiv.googlecode.com/svn/trunk/html5.js','text/javascript',array('conditional'=>'IE')) . "\n";?></head><body><header><h1><a href="/index.html">Pádraic Brady's Blog</a></h1><nav><ul><li><a href="/index.html">Home</a></li><li><a href="#">About</a></li><li><a href="#">Projects</a></li><li><a href="#">Contact</a></li></ul></nav></header><section><?php echo $this->layout()->content ?></section><footer><p>Copyright © 2009 Pádraic Brady</p><p>Powered by <a href="/index.html">ZFBlog</a></p></footer></body></html>
Zend_View_Helper_Doctype
and Zend_View_Helper_HeadMeta are both echoed
unchanged, except to add some standard indentation and newlines where
appropriate. This merely ensures the markup source is easier to read.
Rather than set any values within the Layout for these two, we will
instead configure them from our bootstrap using options from
application.ini.
Zend_View_Helper_HeadTitle
is called to set a Title part "Pádraic Brady's Blog". You can set
additional parts and they will be rendered within a
<title> element separated by any separator you choose
to set using
Zend_View_Helper_HeadTitle::setSeparator(). The
optional second argument to the primary method
headTitle() can be set to "APPEND", the default,
or "PREPEND" to ensure a title part is rendered at the start of the
Title.
Zend_View_Helper_HeadLink
can be used to append, prepend or replace stylesheet links. It also works
for other generic links by passing an array of attributes and values to
Zend_View_Helper_HeadLink::headLink(). Alternate
links can be set using appendAlternate() and its siblings
(prepend/set/offsetSetAlternate()). When adding
stylesheets the optional parameters include setting the media and type
attributes, and also setting an array of conditionals (such as we use in
the next line for including a javascript file only for Internet Explorer).
If you need to add a block of styles, this can be accomplished using
Zend_View_Helper_Style instead. Finally,
Zend_View_Helper_Script allows for the inclusion of
scripts including javascript files.
You can note some of the
similarities across these concrete Placeholder implementations. They have
methods to set, append, and prepend items. Many also offer
offsetSet*() methods to set items at a particular
point in the array of items to render.
One piece of markup I've
omitted is the charset <meta> tag. This cannot
currently be rendered by the Zend Framework, but we'll solve this in the
next section. For now, let's make some changes to our
ZFExt_Bootstrap::_initView() method to configure
the meta tags and Doctype to be rendered.
<?phpclass ZFExt_Bootstrap extends Zend_Application_Bootstrap_Bootstrap{// ...protected function _initView(){$options = $this->getOptions();$config = $options['resources']['view'];if (isset($config)) {$view = new Zend_View($config);} else {$view = new Zend_View;}if (isset($config['doctype'])) {$view->doctype($config['doctype']);}if (isset($config['language'])) {$view->headMeta()->appendName('language', $config['language']);}$viewRenderer = Zend_Controller_Action_HelperBroker::getStaticHelper('ViewRenderer');$viewRenderer->setView($view);return $view;}// ...}
We can now modify
application.ini to add at least one piece of meta
information, the page's language. This is not a standard
Zend_View configuration value, just a default we
impose from our bootstrap class when setting meta information for the
page.
[production]; PHP INI SettingsphpSettings.display_startup_errors = 0phpSettings.display_errors = 0; Bootstrap Locationbootstrap.path = APPLICATION_ROOT "/library/ZFExt/Bootstrap.html"bootstrap.class = "ZFExt_Bootstrap"; Standard Resource Optionsresources.frontController.controllerDirectory = APPLICATION_PATH "/controllers/index.html"resources.view.encoding = "UTF-8"resources.modifiedFrontController.contentType = "text/html;charset=utf-8"resources.layout.layout = "default"resources.layout.layoutPath = APPLICATION_PATH "/views/layouts/index.html"; Autoloader OptionsautoloaderNamespaces[] = "ZFExt_"; HTML Markup Optionsresources.view.doctype = "HTML5"resources.view.language = "en"[staging : production][testing : production]phpSettings.display_startup_errors = 1phpSettings.display_errors = 1resources.frontController.throwExceptions = 1[development : production]phpSettings.display_startup_errors = 1phpSettings.display_errors = 1resources.frontController.throwExceptions = 1
For the moment at least, Zend Framework support for HTML 5 does not extend beyond offering an HTML Doctype. The Doctype used is actually important, not simply because it renders at the top of our Layout but because it determines how tags are constructed by a number of View Helpers. As I said before, I prefer an XHTML style approach to HTML 5 with closed tags, lowercase attribute names, and attribute values enclosed in quotes, among other facets. HTML 5 itself is relatively agnostic to these details, indeed it defines an XML serialisation as an alternate to the typical HTML variant.
With our Doctype set to
"HTML5" this is problematic because when testing for XHTML, View Helpers
check whether the Doctype name starts with "XHTML". HTML5 (our current
Doctype option value) does not. To resolve this we should add a custom
implementation of the standard
Zend_View_Helper_Doctype (a simple subclass is all
that's needed) to add support for an option called "XHTML5" which will
ensure XHTML rules are applied to any output from View Helpers where they
apply.
We'll store this custom
View Helper at
/library/ZFExt/View/Helper/Doctype.php. In order for
our application to tell Zend_View where to find
these custom helpers, we can define some new application.ini options in
our "Standard Resource Options" section. These will provide a new path
where custom View Helpers can be found, and the class prefix they use. We
need no additional changes thereafter - custom View Helpers which reflect
the name of any Zend Framework View Helper (i.e. they end with the same
camel cased term) override the framework's helpers. So calling
Zend_View::doctype() would now first check for a
custom View Helper of that name.
[production]; PHP INI SettingsphpSettings.display_startup_errors = 0phpSettings.display_errors = 0; Bootstrap Locationbootstrap.path = APPLICATION_ROOT "/library/ZFExt/Bootstrap.html"bootstrap.class = "ZFExt_Bootstrap"; Standard Resource Optionsresources.frontController.controllerDirectory = APPLICATION_PATH "/controllers/index.html"resources.view.encoding = "UTF-8"resources.modifiedFrontController.contentType = "text/html;charset=utf-8"resources.layout.layout = "default"resources.layout.layoutPath = APPLICATION_PATH "/views/layouts/index.html"resources.view.helperPath = "/zendframeworkbook/en/10/ZFExt/View/Helper/index.html"resources.view.helperPathPrefix = "ZFExt_View_Helper_"; Autoloader OptionsautoloaderNamespaces[] = "ZFExt_"; HTML Markup Optionsresources.view.doctype = "HTML5"resources.view.language = "en"[staging : production][testing : production]phpSettings.display_startup_errors = 1phpSettings.display_errors = 1resources.frontController.throwExceptions = 1[development : production]phpSettings.display_startup_errors = 1phpSettings.display_errors = 1resources.frontController.throwExceptions = 1
Implementing this new
View Helper has a single goal - to allow for a new Doctype of XHTML5 which
outputs the standard HTML5 doctype is echoed in a template. Any retrieval
of the Doctype should also return the correct value which passes the XHTML
test used by other View Helpers. If you followed the setting up of a new
AllTests.php file for the domain model tests earlier, you can repeat that
process for any custom View Helpers we intend adding. Here are our unit
tests for such an implementation stored at
/tests/ZFExt/View/Helper/DoctypeTest.php.
<?phpclass ZFExt_View_Helper_DoctypeTest extends PHPUnit_Framework_TestCase{protected $helper = null;public function setup(){$this->helper = new ZFExt_View_Helper_Doctype;}public function testRendersHtml5DoctypeForXhtmlSerialisation(){$this->helper->doctype('XHTML5');$this->assertEquals('<!DOCTYPE html>', (string) $this->helper);}public function testReturnsXhtmlDoctypeName(){$this->helper->doctype('XHTML5');$this->assertEquals('XHTML5', $this->helper->getDoctype());}}
Implementing this
requires a simple subclass at
/library/ZFExt/View/Helper/Doctype.php.
<?phpclass ZFExt_View_Helper_Doctype extends Zend_View_Helper_Doctype{const XHTML5 = 'XHTML5';public function __construct(){parent::__construct();$this->_registry['doctypes'][self::XHTML5] = '<!DOCTYPE html>';}public function doctype($doctype = null){if (null !== $doctype && $doctype == self::XHTML5) {$this->setDoctype($doctype);} else {parent::doctype($doctype);}return $this;}}
As you can see from the class, except for any specific handling of XHTML5, we just hand control back to the parent class for all other possible Doctypes.
Another facet of HTML 5
support we can tackle is the new charset attribute that be used in a
<meta> tag. Effectively this is used to replace:
<meta http-equiv="Content-Type" content="text/html; charset=utf-8"/>
With a shorter form which doesn't assert a Content-Type. Of course, you can still add the Content-Type if you need to but the web application should be served under the correct type anyway.
<meta charset="utf-8"/>
Unfortunately
Zend_View_Helper_HeadMeta, the View Helper
responsible for allowing templates and Layouts to add meta information
does not recognise the charset attribute as valid. We can persuade it
otherwise by adding another custom View Helper, again overriding the
original class. Once more we'll subclass the original to minimise the code
we need to write.
Here are the relevant
unit tests stored at
/tests/ZFExt/View/Helper/HeadMetaTest.php.
<?phpclass ZFExt_View_Helper_HeadMetaTest extends PHPUnit_Framework_TestCase{protected $helper = null;protected $view = null;public function setup(){foreach (array(Zend_View_Helper_Placeholder_Registry::REGISTRY_KEY, 'Zend_View_Helper_Doctype') as $key) {if (Zend_Registry::isRegistered($key)) {$registry = Zend_Registry::getInstance();unset($registry[$key]);}}/*** This custom helper only concerns (X)HTML 5 support* using the ZFExt doctype helper for the XHTML flavour*/$this->view = new Zend_View();$this->view->addHelperPath('ZFExt/View/Helper', 'ZFExt_View_Helper');$this->helper = new ZFExt_View_Helper_HeadMeta();$this->helper->setView($this->view);}public function testRendersHtml5CharsetMetaElement(){$this->view->doctype('HTML5');$this->helper->setCharset('utf-8');$this->assertEquals('<meta charset="utf-8">', (string) $this->helper);}public function testRendersXhtml5CharsetMetaElement(){$this->view->doctype('XHTML5');$this->helper->setCharset('utf-8');$this->assertEquals('<meta charset="utf-8"/>', (string) $this->helper);}}
The implementation is a
little more involved than usual since we are adding support for a whole
other <meta> tag type not present previously. The new
class is written to
/library/ZFExt/View/Helper/HeadMeta.php.
<?phpclass ZFExt_View_Helper_HeadMeta extends Zend_View_Helper_HeadMeta{protected $_typeKeys = array('name', 'http-equiv', 'charset');public function setCharset($charset){$item = new stdClass;$item->type = 'charset';$item->charset = $charset;$item->content = null;$item->modifiers = array();$this->set($item);return $this;}protected function _isValid($item){if ((!$item instanceof stdClass)|| !isset($item->type)|| !isset($item->modifiers)){return false;}$doctype = $this->view->doctype()->getDoctype();if (!isset($item->content)&& (($doctype !== 'HTML5' && $doctype !== 'XHTML5')|| (($doctype == 'HTML5' || $doctype == 'XHTML5') && $item->type !== 'charset'))) {return false;}return true;}public function itemToString(stdClass $item){if (!in_array($item->type, $this->_typeKeys)) {require_once '/zendframeworkbook/en/10/Zend/View/Exception.html';throw new Zend_View_Exception(sprintf('Invalid type "%s" provided for meta', $item->type));}$type = $item->type;$modifiersString = '';foreach ($item->modifiers as $key => $value) {if (!in_array($key, $this->_modifierKeys)) {continue;}$modifiersString .= $key . '="' . $this->_escape($value) . '" ';}if ($this->view instanceof Zend_View_Abstract) {if ($this->view->doctype()->getDoctype() == 'XHTML5'&& $type == 'charset') {$tpl = '<meta %s="%s"/>';} elseif ($this->view->doctype()->getDoctype() == 'HTML5'&& $type == 'charset') {$tpl = '<meta %s="%s">';} elseif ($this->view->doctype()->isXhtml()) {$tpl = '<meta %s="%s" content="%s" %s/>';} else {$tpl = '<meta %s="%s" content="%s" %s>';}} else {$tpl = '<meta %s="%s" content="%s" %s/>';}$meta = sprintf($tpl,$type,$this->_escape($item->$type),$this->_escape($item->content),$modifiersString);return $meta;}}
Don't worry if this all looks incomprehensible! We'll cover some application specific View Helpers in later chapters but, for the moment, we just need these two custom helpers to ensure we have fuller HTML 5 support at our fingertips.
In the class above we're
replacing two original methods: _isValid() and
itemToString(). The first validates the details
of some meta information we want to render in a <meta>
tag. The data is stored as an instance of stdClass, i.e. it's a simple
data container that could just as easily have been an array. The main
validation addition I made was to allow a new meta type of "charset" if
the Doctype was one of the HTML 5 types. In the
itemToString() method I added the capability to
compose this new meta type into a <meta> tag, closing the tag if the
Doctype used was XHTML5.
I also added a new
method, setCharset() so creating this new tag is
differentiated from the original two meta types supported, i.e. simple
name/value types and http-equiv types.
With our new HTML 5
support completed, let's revisit application.ini and
add a new HTML Markup Option called "charset" along with the new Doctype.
Really, we could just use the Zend_View setting for
character encoding but I decided to keep them separate so we could
conditionally add the new meta tag type only if its specific option was
set.
[production]; PHP INI SettingsphpSettings.display_startup_errors = 0phpSettings.display_errors = 0; Bootstrap Locationbootstrap.path = APPLICATION_ROOT "/library/ZFExt/Bootstrap.html"bootstrap.class = "ZFExt_Bootstrap"; Standard Resource Optionsresources.frontController.controllerDirectory = APPLICATION_PATH "/controllers/index.html"resources.view.encoding = "UTF-8"resources.view.helperPath = "/zendframeworkbook/en/10/ZFExt/View/Helper/index.html"resources.view.helperPathPrefix = "ZFExt_View_Helper_"resources.modifiedFrontController.contentType = "text/html;charset=utf-8"resources.layout.layout = "default"resources.layout.layoutPath = APPLICATION_PATH "/views/layouts/index.html"; Autoloader OptionsautoloaderNamespaces[] = "ZFExt_"; HTML Markup Optionsresources.view.charset = "utf-8"resources.view.doctype = "XHTML5"resources.view.language = "en"[staging : production][testing : production]phpSettings.display_startup_errors = 1phpSettings.display_errors = 1resources.frontController.throwExceptions = 1[development : production]phpSettings.display_startup_errors = 1phpSettings.display_errors = 1resources.frontController.throwExceptions = 1
We can now also amend
the bootstrap class _initView() method to follow
up and use the new charset option.
<?phpclass ZFExt_Bootstrap extends Zend_Application_Bootstrap_Bootstrap{// ...protected function _initView(){$options = $this->getOptions();$config = $options['resources']['view'];if (isset($config)) {$view = new Zend_View($config);} else {$view = new Zend_View;}if (isset($config['doctype'])) {$view->doctype($config['doctype']);}if (isset($config['language'])) {$view->headMeta()->appendName('language', $config['language']);}if (isset($config['charset'])) {$view->headMeta()->setCharset($config['charset'], 'charset');}$viewRenderer = Zend_Controller_Action_HelperBroker::getStaticHelper('ViewRenderer');$viewRenderer->setView($view);return $view;}// ...}
Go ahead now and reload the blog's index page. If you check the source code, it should now be completely in line with the original markup we introduced at the start of the chapter.
Our use of the YUI CSS framework has supplied us with a baseline style for the blog which is very basic but agreeable across all major browsers. We can supplement this with our own customised styles to provide the blog with a more well rounded look.
To achieve this we need
to make a change so that our Layout template also includes a style.css
file stored at /public/css/style.css. Into this file
we can place additional CSS rules. Here's the revised
<head> section of the altered layout.
<?php echo $this->doctype() . "\n" ?><html><head><?phpecho $this->headMeta()->setIndent(' ') . "\n";echo $this->headTitle('Pádraic Brady\'s Blog')->setSeparator(' / ')->setIndent(' ') . "\n";echo $this->headLink()->setIndent(' ')->appendStylesheet('http://yui.yahooapis.com/2.7.0/build/reset-fonts-grids/reset-fonts-grids.css')->appendStylesheet('http://yui.yahooapis.com/2.7.0/build/base/base-min.css')->appendStylesheet('/css/style.css') . "\n ";echo $this->headScript()->prependFile('http://html5shiv.googlecode.com/svn/trunk/html5.js','text/javascript',array('conditional'=>'IE')) . "\n";?></head>
Bearing in mind that we
may take the Yahoo
Performance Best Practices into consideration, let's formally add
our previous View Helper example into the mix with a few changes. Here's
the actual unit tests utilised by the custom helper
ZFExt_View_Helper_IncludeModifiedDate. They utilise
an empty style.css file you can put at
/tests/ZFExt/View/Helper/_files/style.css to get a
modified date. The tests are stored at
/tests/ZFExt/View/Helper/IncludeModifiedDateTest.php.
As with all these tests, add them to the closest
AllTests.php file to run from PHPUnit. The only
tricky part is managing the working directory PHP is currently using so a
relative URI makes sense in the test and hits our style.css file
correctly.
<?phpclass ZFExt_View_Helper_IncludeModifiedDateTest extends PHPUnit_Framework_TestCase{protected $helper = null;private $cwd = null;public function setup(){$this->helper = new ZFExt_View_Helper_IncludeModifiedDate;$this->cwd = getcwd();chdir(dirname(__FILE__));}public function teardown(){chdir($this->cwd);}public function testAddsTimestampToFilenameBeforeFileExtension(){$file = '/_files/style.css';$timestamped = $this->helper->includeModifiedDate($file);$this->assertTrue((bool) preg_match("/^\/_files\/style\.\d{10,}\.css\$/", $timestamped));}public function testAddsTimestampToFilenameBeforeFileExtensionWithUriQueryString(){$file = '/_files/style_version_2.0.css';$timestamped = $this->helper->includeModifiedDate($file);$this->assertTrue((bool) preg_match("/^\/_files\/style\.\d{10,}\.css\?version=2\.0$/", $timestamped));}}
As you can probably
notice, we've beefed up the helper to handle an additional case where a
file URI may already include a query string of some type already. This
time it also adds the modification timestamp within the filename instead
of the query string. This handles a scenario where many proxies ignore the
query string when caching files, so changing the filename or path is far
more effective. Of course we do not physically change the filename -
instead we'll add a new rewrite rule to
/public/.htaccess so any URIs to physical files of
the form /name.timestamp.extension (e.g.
/style.1252108229.css) are remapped to the actual
filename correctly. Here's the implementation stored at
/library/ZFExt/View/Helper/IncludeModifiedDate.php.
<?phpclass ZFExt_View_Helper_IncludeModifiedDate extends Zend_View_Helper_Abstract{public function includeModifiedDate($uri) {$parts = parse_url($uri);$root = getcwd();$mtime = filemtime($root . $parts['path']);return preg_replace("/(\.[a-z0-9]+)(\?*.*)$/",'.'.$mtime.'$1$2',$uri);}}
The following change adds support for this style of timestamping
files to /public/.htaccess, so we do load the
underlying file which doesn't have a timestamp included in its name. The
rewrite rule merely removes the timestamp part of the incoming filename.
You can add in additional file extensions or directories this applies to
as needed. I've assumed some reasonable common defaults.
SetEnv APPLICATION_ENV development

RewriteEngine On

RewriteRule ^(scripts|css|images)/(.+)\.(.+)\.(js|css|jpg|gif|png)$ $1/$2.$4 [L]

RewriteCond %{REQUEST_FILENAME} -s [OR]
RewriteCond %{REQUEST_FILENAME} -l [OR]
RewriteCond %{REQUEST_FILENAME} -d

RewriteRule ^.*$ - [NC,L]
RewriteRule ^.*$ /index.php [NC,L]
Our layout template can now utilise the new custom helper as follows.
<?php echo $this->doctype() . "\n" ?><html><head><?phpecho $this->headMeta()->setIndent(' ') . "\n";echo $this->headTitle('Pádraic Brady\'s Blog')->setSeparator(' / ')->setIndent(' ') . "\n";echo $this->headLink()->setIndent(' ')->appendStylesheet('http://yui.yahooapis.com/2.7.0/build/reset-fonts-grids/reset-fonts-grids.css')->appendStylesheet('http://yui.yahooapis.com/2.7.0/build/base/base-min.css')->appendStylesheet($this->includeModifiedDate('/css/style.css')) . "\n ";echo $this->headScript()->prependFile('http://html5shiv.googlecode.com/svn/trunk/html5.js','text/javascript',array('conditional'=>'IE')) . "\n";?></head>
We won't use the View
Helper with any of the YUI CSS URIs since they already have a built in
reference to a version number. We can change the URIs manually as new
version of the CSS framework are released, all from the layout template,
without necessitating any other changes. Keeping track of our layout
markup, here's what the browser output source looks like at this point for
our <head> section:
<!DOCTYPE html><html><head><meta name="language" content="en" /><meta charset="utf-8"/><title>Pádraic Bradys Blog</title><link href="http://yui.yahooapis.com/2.7.0/build/reset-fonts-grids/reset-fonts-grids.css" media="screen" rel="stylesheet" type="text/css" /><link href="http://yui.yahooapis.com/2.7.0/build/base/base-min.css" media="screen" rel="stylesheet" type="text/css" /><link href="/css/style.1252108229.css" media="screen" rel="stylesheet" type="text/css" /><!--[if IE]> <script type="text/javascript" src="http://html5shiv.googlecode.com/svn/trunk/html5.js"></script><![endif]--></head>
As you can see, the style.css URI now has a modified date attached in the query string as we would expect.
If you were wondering
how to accomplish the use of the Expires and
Cache-Control headers in practice, it's usually done from
your Virtual Host configuration. You will need to enable the Apache
mod_expires Module in your web server's configuration beforehand.
Here's a sample configuration of the blog's Virtual Host implementing an Expires header of six months from the first time a client accesses a static file. I've added two rules to illustrate the options - setting by matching files to a regular expression or by explicitly referring to the type the header should be applied to. The rules are embedded in a conditional so they are ignored if the required Module is not loaded in Apache. It is also essential to remember that unless you use a modified date/hash query string for a resource's URI, the client will cache these resources for six months and never retrieve updates during that time unless they lose their cache or force a complete reload (e.g. using CTRL+SHIFT+R in Firefox).
<VirtualHost *:80>
    ServerName zfblog.tld
    DocumentRoot /home/padraic/projects/zfblog/public

    <Directory "/home/padraic/projects/zfblog/public/index.html">
        Options Indexes MultiViews FollowSymLinks
        AllowOverride all
        Order deny,allow
        Allow from all

        <IfModule mod_expires.c>
            ExpiresActive on
            <FilesMatch "\.(ico|jpg|jpeg|png|gif)$">
                ExpiresDefault "access plus 6 months"
            </FilesMatch>
            ExpiresByType text/css "access plus 1 year"
            ExpiresByType text/javascript "access plus 1 year"
        </IfModule>

    </Directory>

</VirtualHost>
Utilising this configuration will cause all the matching file types to be sent to a client with two new headers. For example:
Cache-Control: max-age=31536000
Expires: Sun, 05 Sep 2010 00:39:27 GMT
Expires
indicates a date six months away on which the file should be deemed as
expired and requested once again from the server, and the second,
Cache-Control, indicates the maximum life of the resource in
seconds. At a technical level, the Cache-Control header is
the most important since in most cases it actually overrides the Expires
header. You can also set this up from your .htaccess
file using the same set of rules.
Before we hit the custom
style sheet, let's first make use of what we've already include with the
Yahoo User Interface CSS. The following set of changes to our default
layout template at
/application/views/layouts/default.phtml will add a
typical website layout with header, footer, main body and a left handed
column for any additional navigation links or complementary
content.
<?php echo $this->doctype() . "\n" ?><html><head><?phpecho $this->headMeta()->setIndent(' ') . "\n";echo $this->headTitle('Pádraic Brady\'s Blog')->setSeparator(' / ')->setIndent(' ') . "\n";echo $this->headLink()->setIndent(' ')->appendStylesheet('http://yui.yahooapis.com/2.7.0/build/reset-fonts-grids/reset-fonts-grids.css')->appendStylesheet('http://yui.yahooapis.com/2.7.0/build/base/base-min.css')->appendStylesheet($this->includeModifiedDate('/css/style.css')) . "\n ";echo $this->headScript()->prependFile('http://html5shiv.googlecode.com/svn/trunk/html5.js','text/javascript',array('conditional'=>'IE')) . "\n";?></head><body><div id="doc" class="yui-t1"><header id="hd" role="banner"><hgroup><h1><a href="/index.html">Pádraic Brady's Blog</a></h1><h2>Musings On PHP And Zend Framework</h2></hgroup><nav role="navigation"><ul><li><a href="/index.html">Home</a></li><li><a href="#">About</a></li><li><a href="#">Projects</a></li><li><a href="#">Contact</a></li></ul></nav></header><div id="bd"><div id="yui-main"><div class="yui-b" role="main"><section id ="content" class="yui-g"><?php echo $this->layout()->content ?></section></div></div><section class="yui-b"><nav role="navigation" aria-labelledby="leftnav-label"><h2 id="leftnav-label">External Links</h2><ul><li><a href="#">Survive The Deep End</a></li><li><a href="#">Zend Framework</a></li><li><a href="#">Planet-PHP</a></li><li><a href="#">I'm on Twitter!</a></li></ul></nav></section></div><footer id="ft" role="contentinfo"><p>Copyright © 2009 Pádraic Brady</p><p>Powered by <a href="/index.html">ZFBlog</a></p></footer></div></body></html>
Since we are using HTML
5, much of the new markup uses the new elements except where they are very
clearly needed for the sole purpose of applying the grid layout. For these
cases, I've used the normal <div> element. This
maintains a logical set of elements where there are only two distinct
<section> elements. One for the main content, the other
for the left hand sidebar I've introduced. <div> is
thus relegated to the boring category of adding CSS "hooks" to the markup
for styling - not exactly the cleanest approach but I'm using a CSS
Framework so I can live with that.
I've also added roles to
a number of elements in accordance with another new standard besides HTML
5, Accessible Rich
Internet Applications Suite (WAI–ARIA 1.0), which defines a way to
try and make web content and applications more accessible to people with
disabilities. It's a small gesture to make while we're adopting HTML 5 and
creating a layout from scratch. The standard defines a set of "document
landmark roles" which in theory would allow a person using the right
software to cut through the web of markup to the parts of the HTML
document they want. The roles are therefore very intuitive: banner, main,
navigation, contentinfo, complementary, search, etc. There are a lot of
these but I'm only using the bare minimum. As an added incentive landmark
roles are currently supported by the
JAWS 10 screen reader.
In adding a subtitle to
the blog, I added a new <hgroup> element. This element
groups together related headers and is defined in the HTML 5 specification
as follows.
- hgroup
-
The hgroup element is typically used to group a set of one or more h1-h6 elements — to group, for example, a section title and an accompanying subtitle.
Reload the URI http://zfblog.tld in your browser to
see what impact this all has.
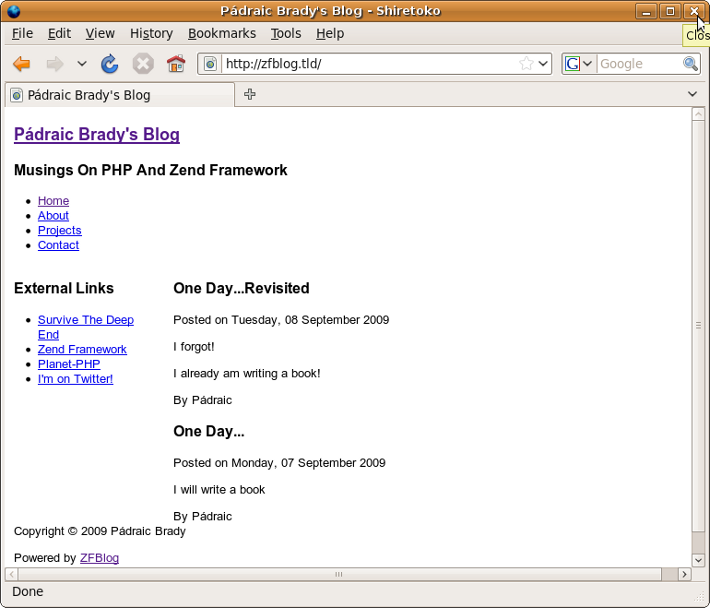
Basic Blog Index Style
The updated design is
beginning, slowly, to look like something we could endure if we possessed
endless patience. Let's improve it a bit more, this time by editing
/public/css/style.css.
/**
 * Basic Elements
 */
body {
    font-family: Geneva, Verdana, Helvetica, sans-serif;
}
a:link, a:visited {
    color: blue;
    text-decoration: none;
}
a:hover {
    color: red;
    text-decoration: underline;
}

/**
 * HTML 5 Block Display
 *
 * Required by most, if not all, browsers until support is added.
 */
article, aside, dialog, figure, footer, header, hgroup, nav, section {
    display:block;
}

/**
 * Page Elements
 */
header#hd {
    text-align:center;
}
footer#ft {
    text-align: center;
    margin-top: 25px;
    border-top: 1px solid lightgray;
    border-bottom: 1px solid lightgray;
}
section#content {
    border-left: 3px double lightgray;
    padding-left: 10px;
}

/**
 * Headers
 */
h1, h2, h3, h4, h5, h6 {
    Helvetica,Arial,Calibri,sans-serif;
}
header#hd h1 {
    font-size: 200%;
    margin-bottom: 0;
}
header#hd h2 {
    margin-top: 0.4em;
    font-size: 100%;
}

/**
 * Horizontal Header Navigation Menu
 */
header#hd nav {
    border-top: 2px solid #000;
    border-bottom: 2px solid #000;
}
header#hd nav ul {
    list-style: none;
    margin: 0 0 0 20px;
    text-align: left;
}
header#hd nav li
{
    display: inline-block;
    min-width: 50px;
    margin: 0 2px 0 2px;
}
header#hd nav a:link, nav a:visited {
    color: blue;
    display: inline-block;
    height: 20px;
    padding: 5px 1.5em;
    text-decoration: none;
}
header#hd nav a:hover {
    background-color: lightgray;
}

/**
 * Vertical Sidebar Menu/Links
 */
section nav h2 {
    font-size: 120%;
}
section nav ul {
    list-style: none;
    width: 100%;
    margin: 0 auto;
}
section nav ul li
{
    float: left;
    display: inline;
    margin: 0;
}

/**
 * Article related styling
 */
article header {
    margin-bottom: 1em;
}
article header h2 {
    border-bottom: 1px dashed gray;
    font-size: 130%;
    color: green;
    margin-bottom: 0.5em;
}
article header p {
    font-style: italic;
}
Now we have a very basic but acceptable style to work with for now.
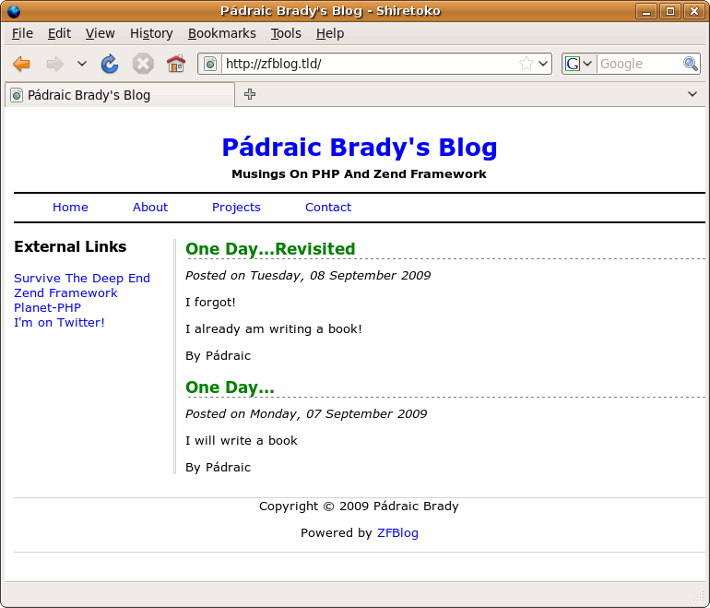
Final Blog Index Style
In this chapter we've
covered the basics of creating a simple web design and migrating it to the
Zend Framework templating system using Zend_View,
Zend_Layout and a number of View Helpers. We'll
cover the creation of custom View Helpers in a lot more detail in the
chapters to come. We've also covered some of the basics of HTML 5, the
upcoming standards update for HTML, and the impact it currently has during
implementation on requiring the use of some custom helpers. I have no
doubt HTML 5 support in the Zend Framework will materialise in the very
near future however, so stay tuned!
In Chapter 11, we'll
move on towards the next basic set of functionality. We'll need to display
blog entries from our database and, of course, have a means of writing
them in the first place! So we will be looking at using our pre-designed
domain model and accepting writing new blog entries using forms generated
using Zend_Form.